
Some things are easier to sketch out quickly using the Grease Pencil. Some things are easier to model. It is ultimately a back-and-forth process that yields the final results.
I needed to redesign the Wrangler’s Cottage based on some screen direction and plot points. Figuring out where characters had to be at any given time meant working out eye lines, and positioning important assets so that they appear in scenes at the right time, composed nicely with the subjects being focused on.
My first step is always a rough sketch. It isn’t pretty. Perspective is often skewed, color choices are muddy, and linework is rough.

But the idea is there. All I need to see is where the major shapes and features are in relation to each other and get a sense of the overall asset. I will then sketch out a rough schematic.
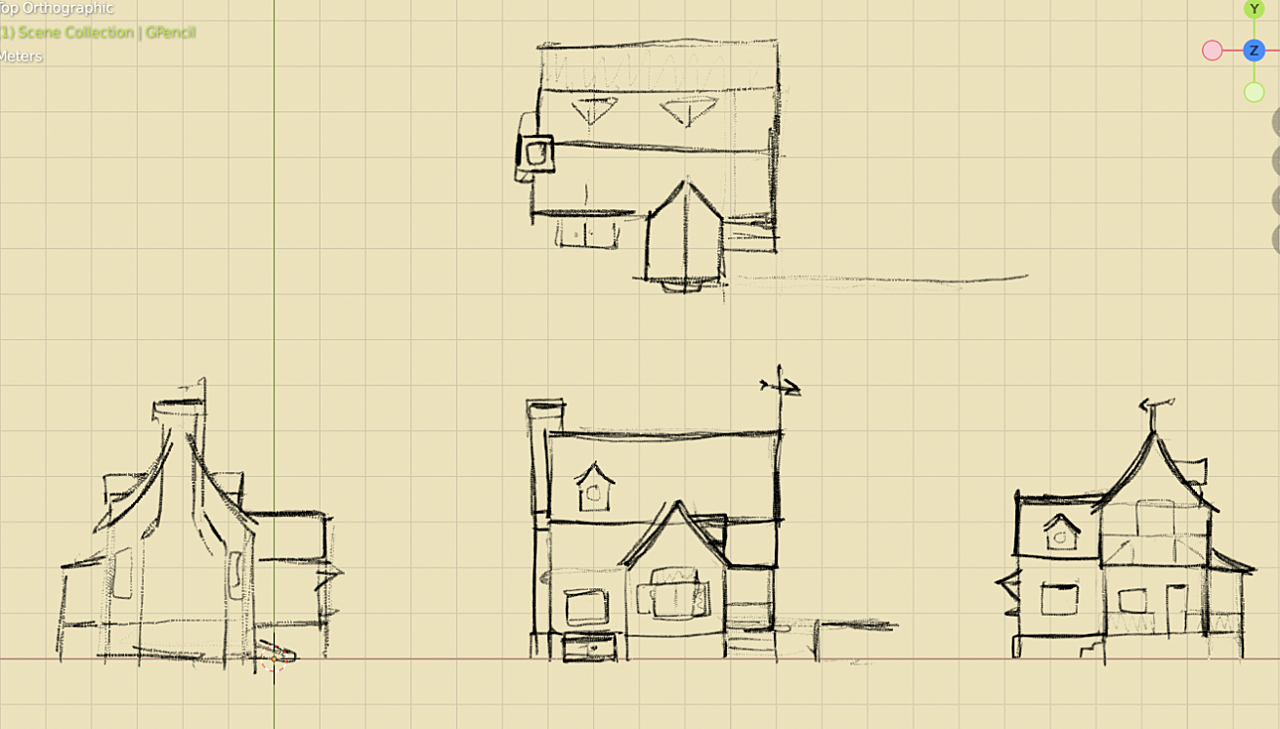
This will now form the basis for a model.

Once I am satisfied with the rough shape and details, I then duplicate it with Shift-D to make a linked duplicate. I set up an orthographic camera, then make three more linked duplicates, and rotate them so that each elevation is facing the orthographic camera.

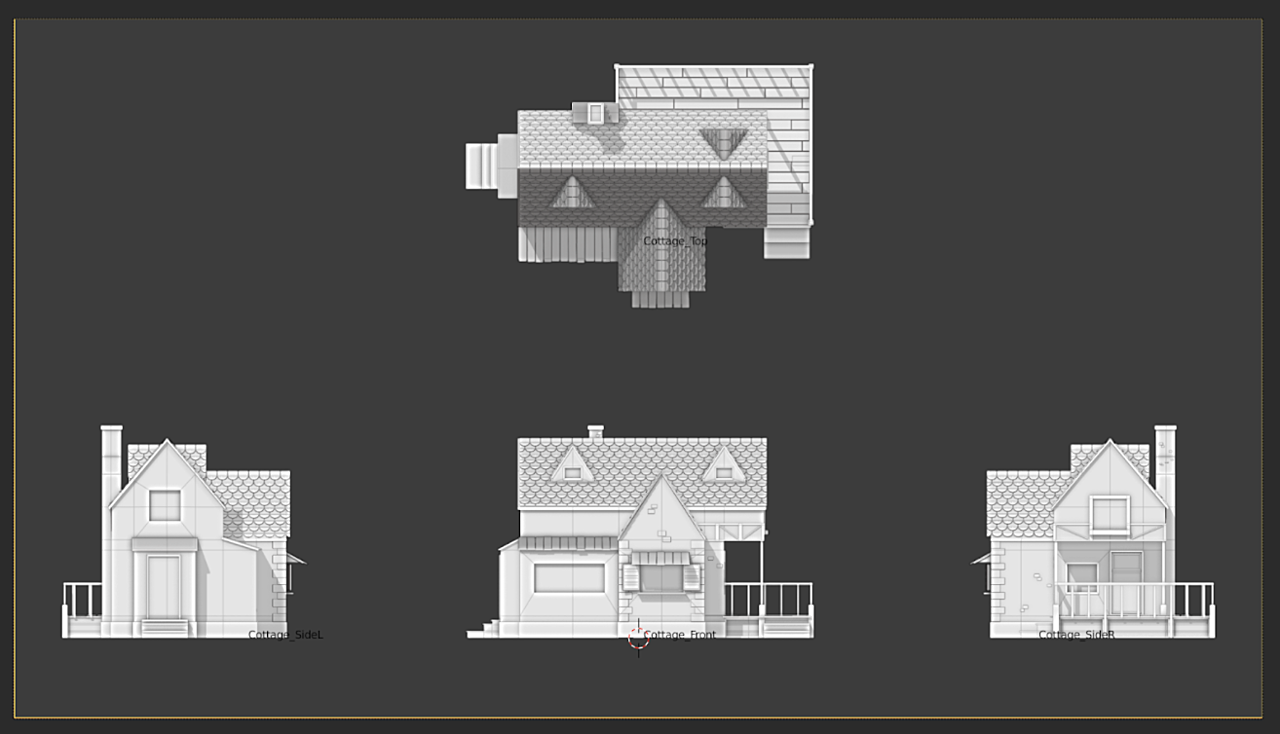
Now for the fun part! I generate the linework with Blender’s new Lineart Modifier… but I use a clever plugin which takes the legwork out of setting it all up - Simple Sketch by Chipp Walters.

One click creates two grease pencil objects with varying line widths. I can see the results aren’t perfect, but they have captured a lot of the finer details.

Furthermore, it is not as simple as an overlay image. What lineart does is detect edges on an object, collection or scene, then projects grease pencil lines onto the meshes from the selected camera. If you were to inspect the scene in viewport, it looks a mess!
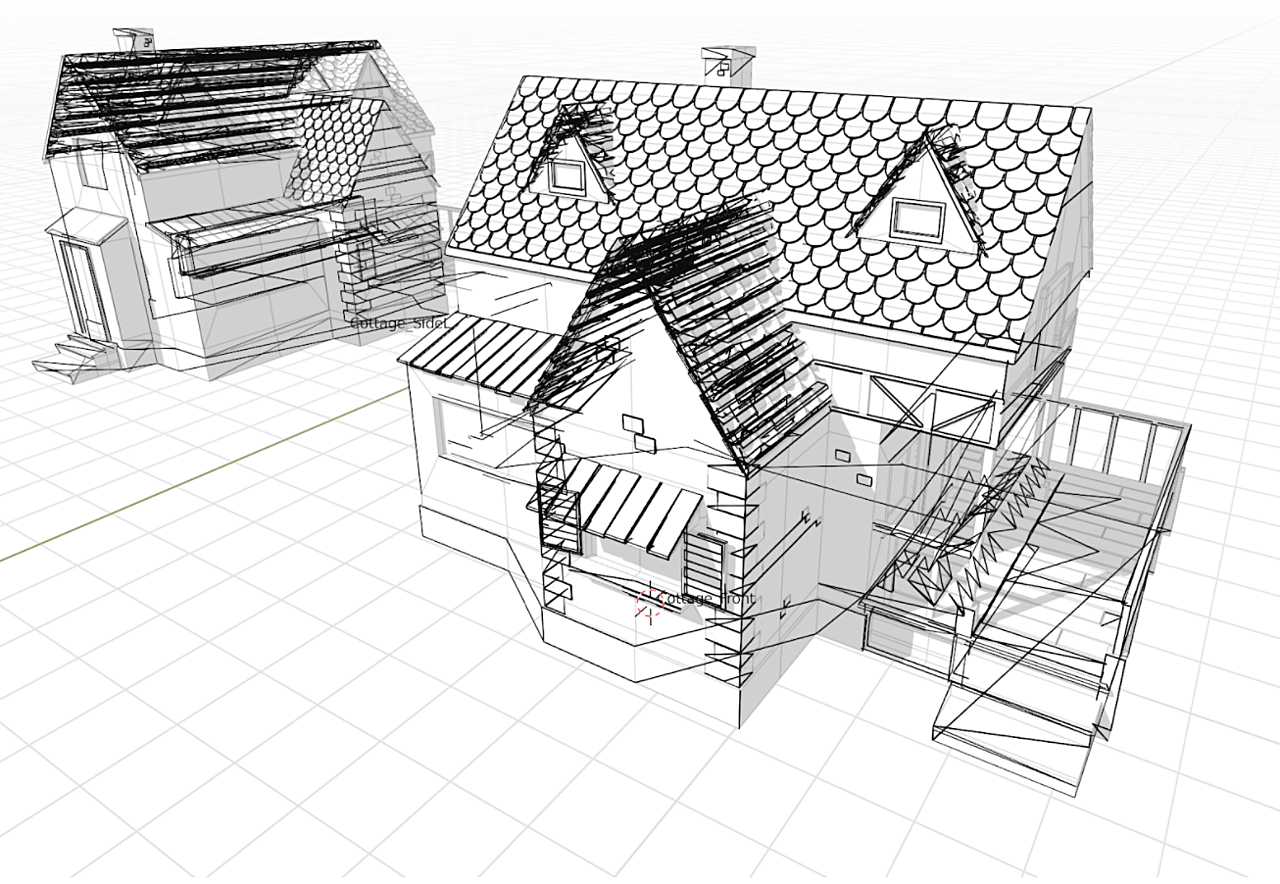
This won’t be workable for what I need to do next, so I need to reproject this solution into a flat plane. I apply the line art modifier to the newly generated grease pencil object, then - looking through the orthographic camera, I select the grease pencil object, enter Edit mode, and do a clean up, reprojecting the strokes to the view.
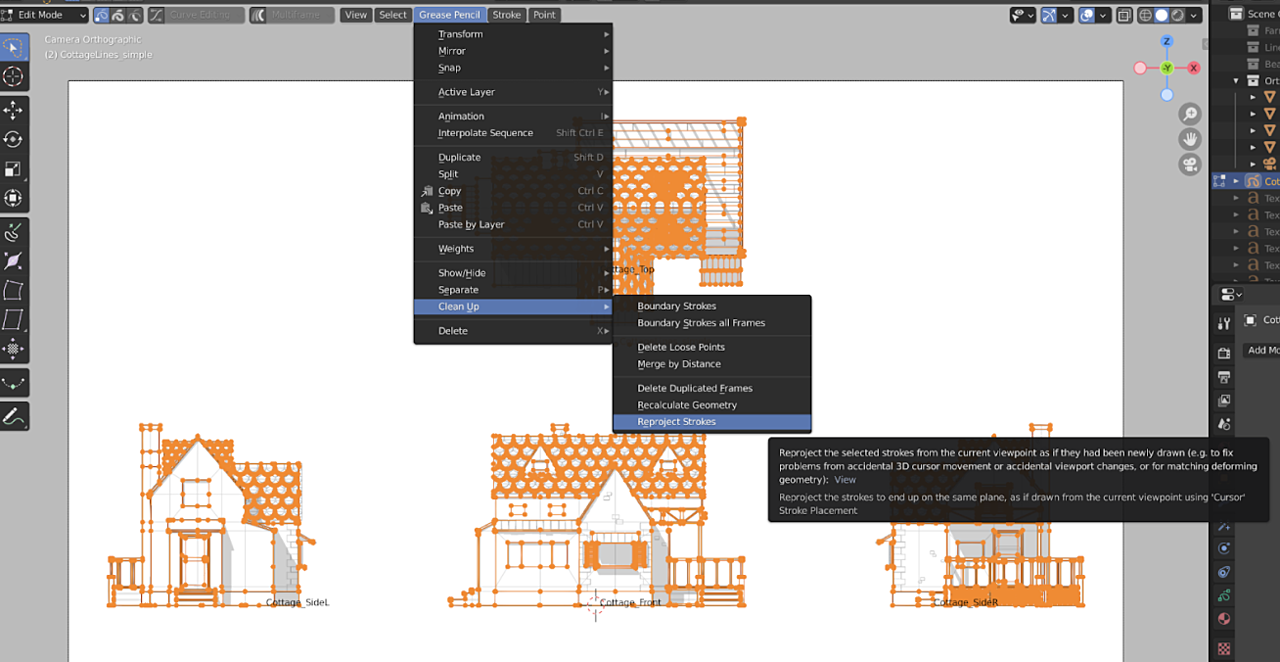

I can now draw directly onto this grease pencil object, adding in further details, or cleaning up some of the more problematic line work.
The end result is pretty clean, and the workbench shading provides accurate shadows to give the elevations a little bit of depth.
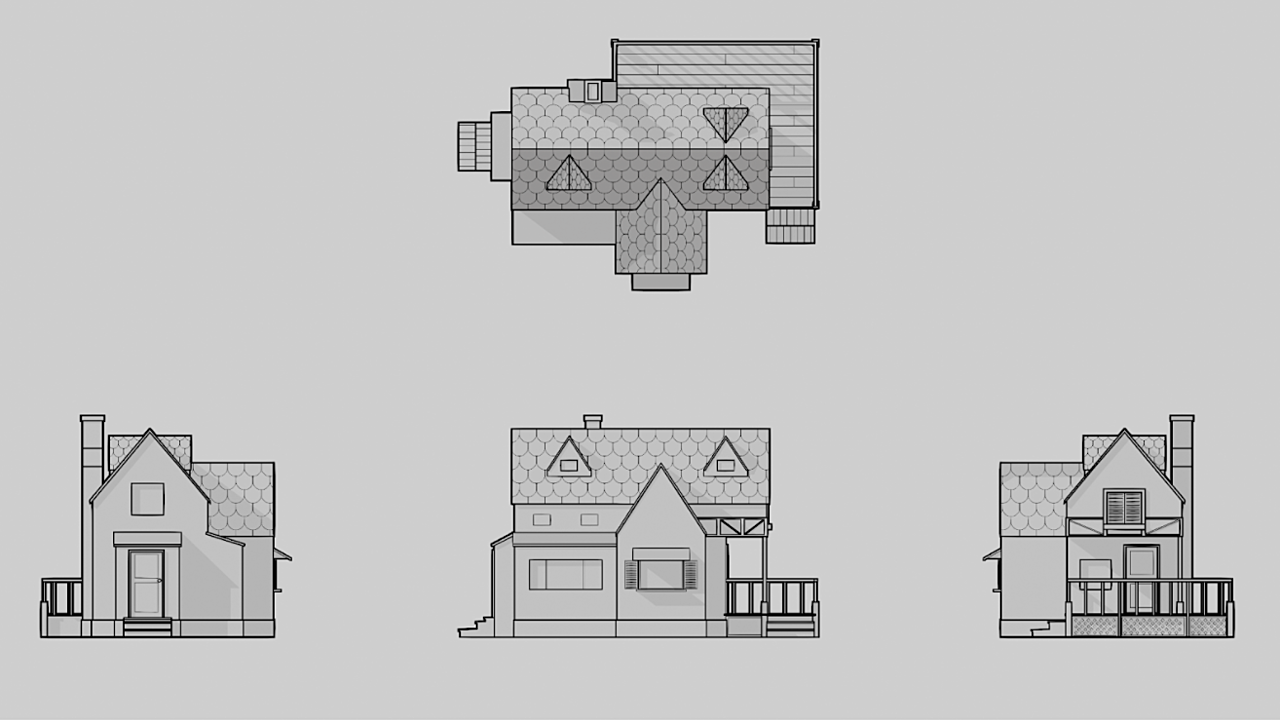
This just leaves the perspective render to do, and this is fairly straightforward, using the same technique as above, but this time with a perspective camera.

The model can be reused in the pipeline as further reference, but this technique plays to my strengths and allows me to get an accurate layout for a modeller to come in and create a more detailed final asset.
